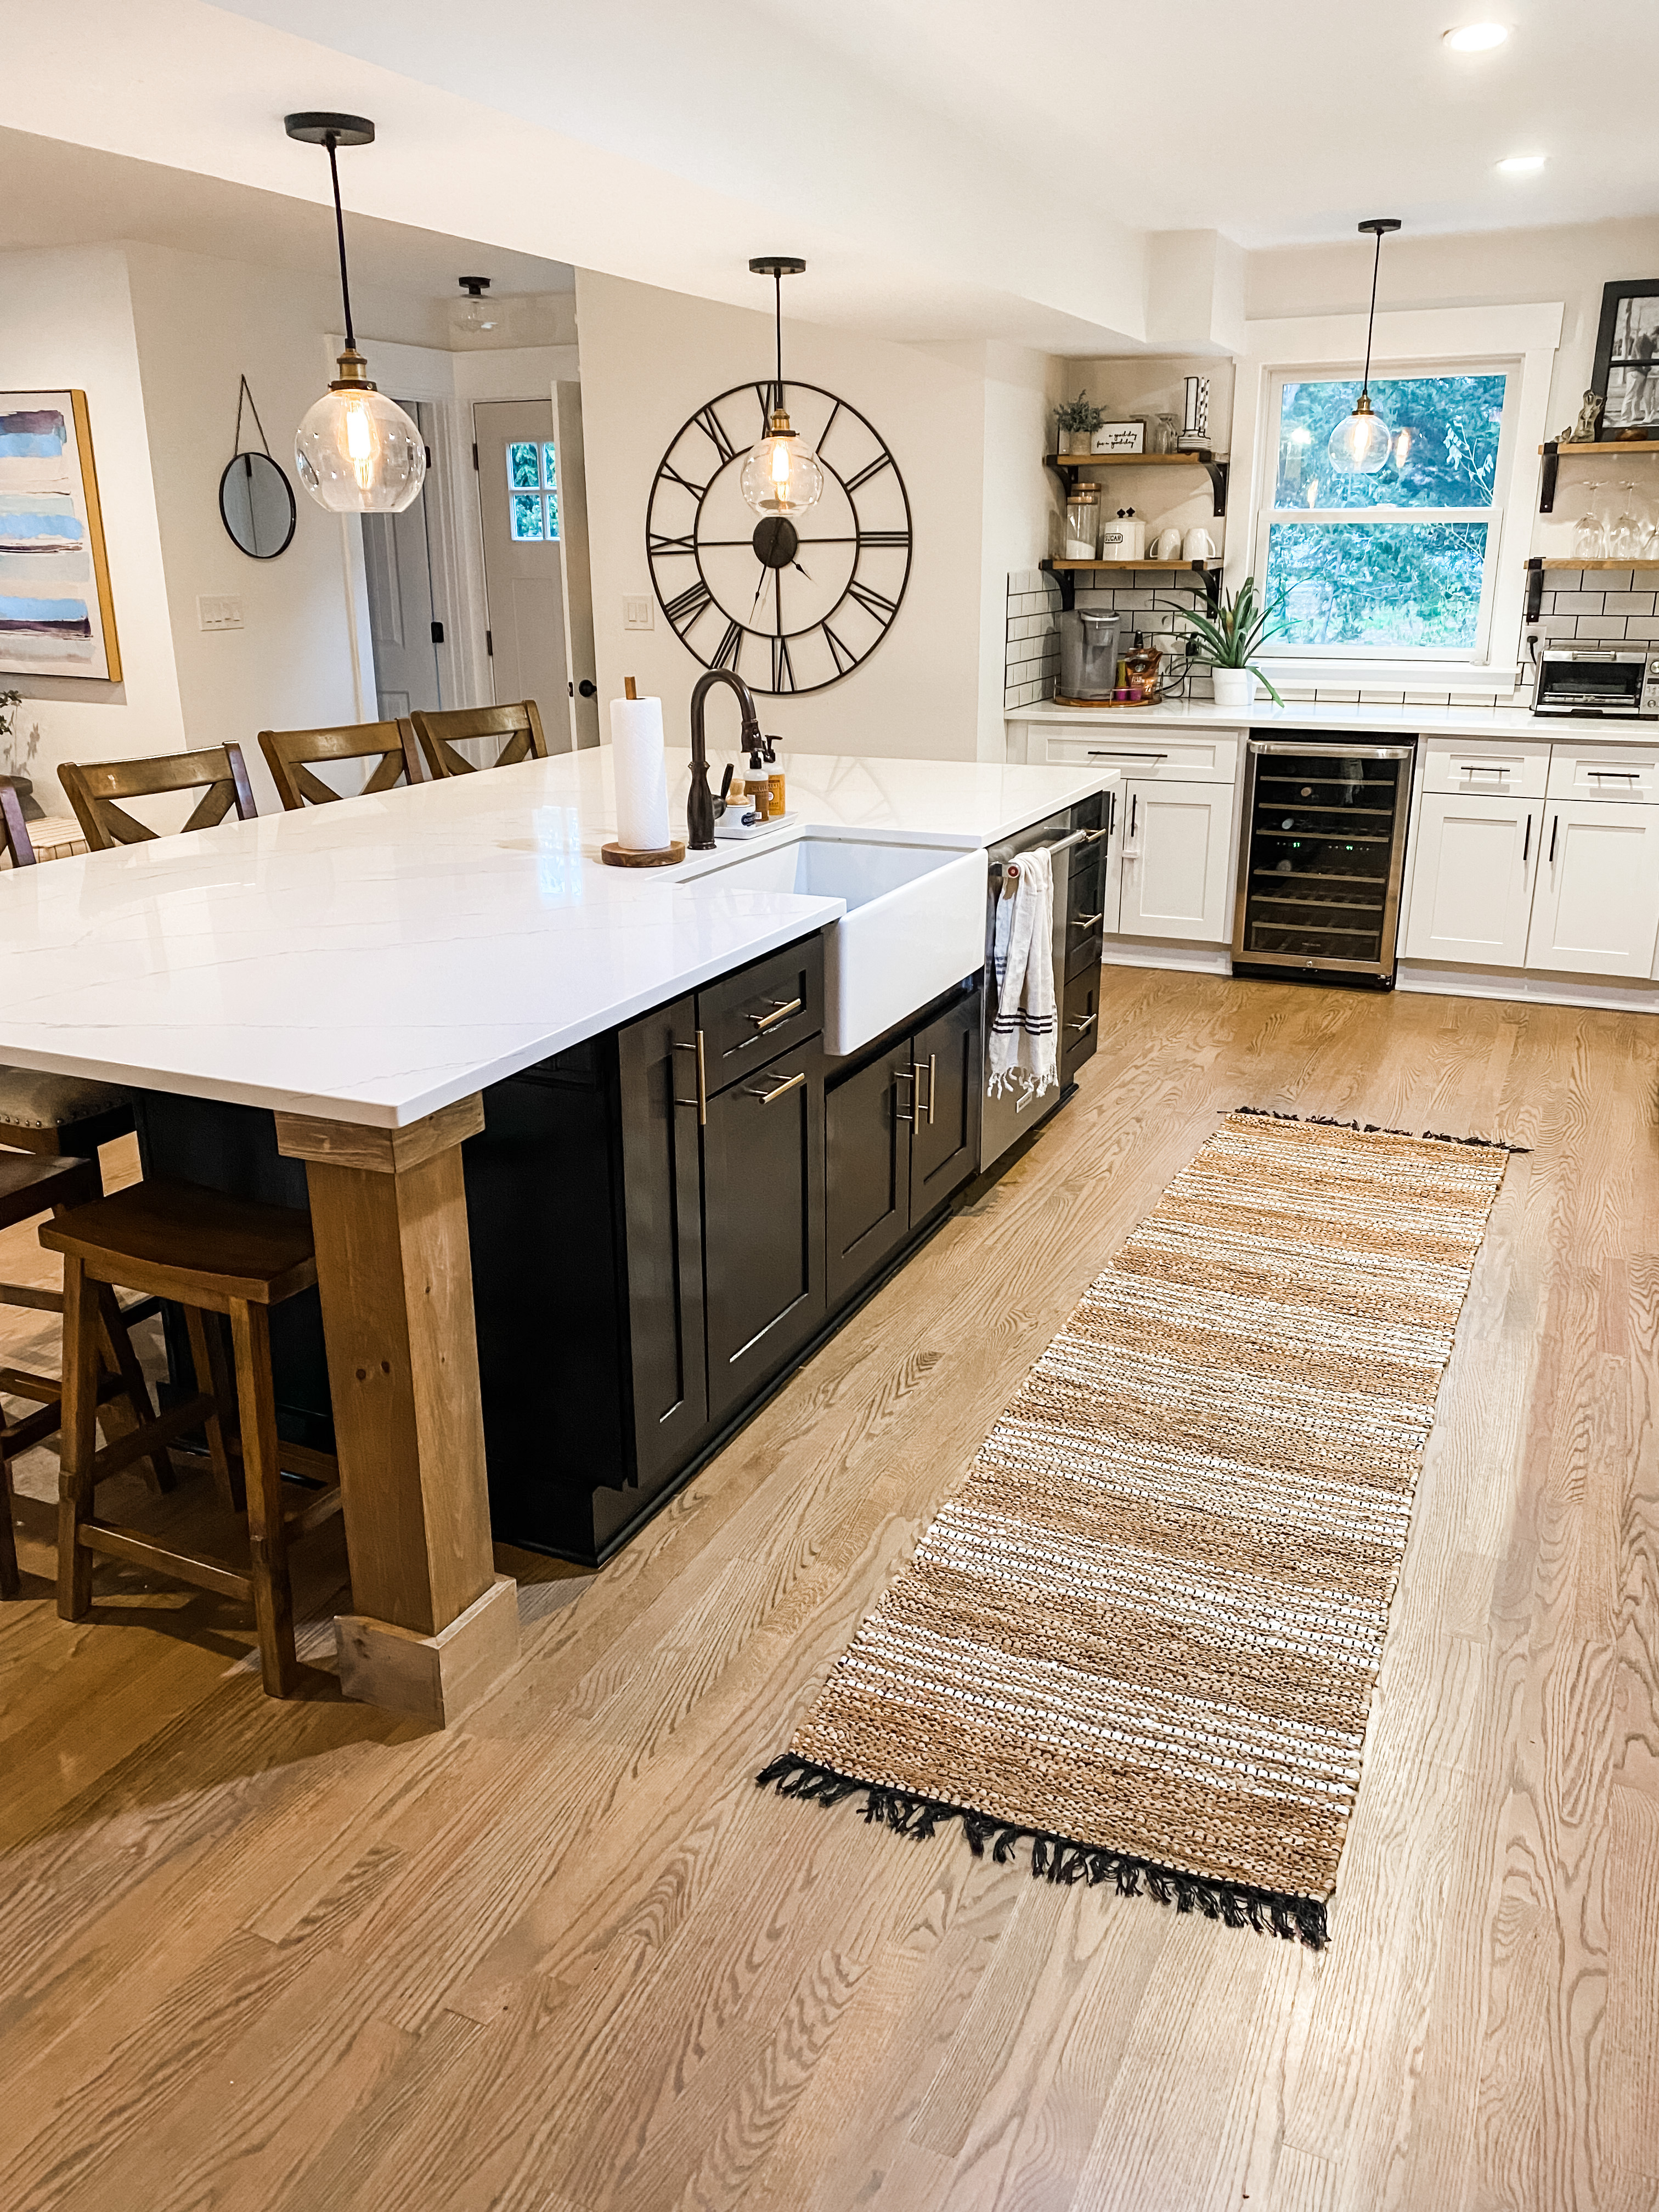
DIY Kitchen Island Makeover
When we were renovating our home, we were faced with so many decisions that were pretty much permanent, it became rather overwhelming. Our cabinets were an obviously huge decision. We wanted a pop of contrast from the get go but ultimately chickened out and went with all white. While we loved it, we just felt like something has been missing…so we decided it was time to make a change but naturally our budget wasn’t on the same page as us, especially right before the holidays…so I decided to take matters into my own hands.
The Before

I researched the heck out of cabinet paints and finally settled on one that I thought would do the trick. The One seemed to check all the boxes; no sanding, no priming, no sealing. I did buy a sealer but TBD if I end up using it. I haven’t yet.
Steps

The prep is So important! I used my Mrs. Meyers cleaner and a microfiber cloth to thoroughly clean our entire island; trim, cabinets, paneling…everything! Usually it is recommended to use a degreaser, but I use Mrs. Meyers for everything and felt it was fine. Remove all hardware. I did not remove the doors or drawers and was totally fine. I saved so much time not having to realign everything.
Then, just get to work! I bought cheapy paint brushes simply because I didn’t want to look for ours. They worked great so I linked them for you here. This is what the cabinets looked like after the first coat.

I know it looks horrifying, but in my experience, I compare it directly to chalk paint; looks awful after the first coat but the second coat goes on like a dream and solves all the world’s problems. A successful outcome definitely involves consistent brush strokes. Perfectly up and down and perfectly side to side. No careless swipes that result in arches. I tried to recreate the make up of the cabinets and did horizontal strokes for the top and bottom panels and vertical strokes for the sides. I did horizontal for all of the center panels.
Below is the second coat…

The light and the fact that it wasn’t entirely dry makes it look a little imperfect but it looks fantastic. The left side of the middle drawer is the best representation of the final outcome.
Lastly, after the paint is dry, replace the hardware. I bought all new handles, linked here. It was about $15 for 10 and they match what we already have but I got brass to replace the bronze. Full transparency, our amazon basics are MUCH better quality but these are fine. They’re not as heavy duty but still screw in sturdy and match our pendants perfectly.
The After

[Don’t mind the balloons on the ceiling in the background, we are still celebrating Bert’s birthday!] I love how the wood pops against the black. It adds such drama to the kitchen now and is a show stopper when you walk in!
I bought a new runner, which I am obsessed with. It ties in the white, black and natural tones perfectly and I got it on an incredible sale! I linked it here for you. It’s made of jute, leather, sisal and cotton.

Overall, I would highly recommend this paint. It dried so quickly, I did a run through once and went right into my second coat. It dried entirely within the hour to the point where the kids were opening and closing cabinets and drawers without an issue. The paint scraped right off of the floor, where it dripped and came right off of the dishwasher and counter with a rag or magic eraser.
One last look…

Our custom wood features were all DIY and made from clear pine with Special Walnut Stain by Minwax.
I’ve linked what I could, below for you.
Comment if you need links to anything else you see or have questions about anything!
Thanks so much for reading!
XOXO
Kel
Follow me on your favorite app!


